要下载FCKeditor2.4.2.zip和 FCKeditor.NET版的2个zip包。
FCKEDITOR下载地址:http://www.fckeditor.net/download
说明:
FCKeditor2.4.2.zip是其最新的文件和图片什么的;
FCKeditor.NET.zip是ASP.NET调用的DLL在里面。
2.分别解压后把FCKeditor2.4.2.zip里的fckeditor目录整个复制到网站中。
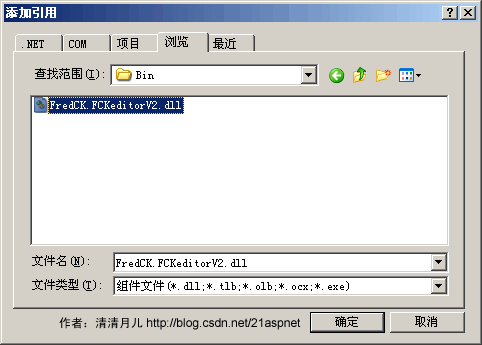
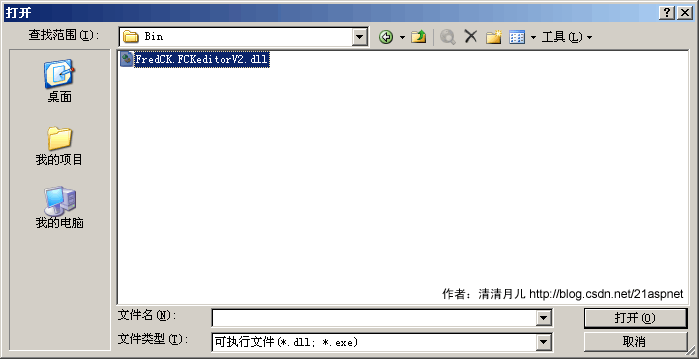
3.解压FCKeditor.NET.zip包后在FCKeditor.Net_2.2\bin\Debug目录里找到FredCK.FCKeditorV2.dll。其他文件没用,把FredCK.FCKeditorV2.dll复制到我们的网站,建立一个Bin目录。
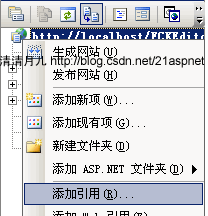
4.引用FredCK.FCKeditorV2.dll。
第一步:
第二步:
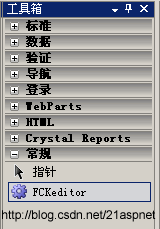
导入工具箱
在“工具箱”下右键
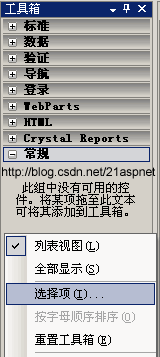
点击“选择项”。弹出如图窗口
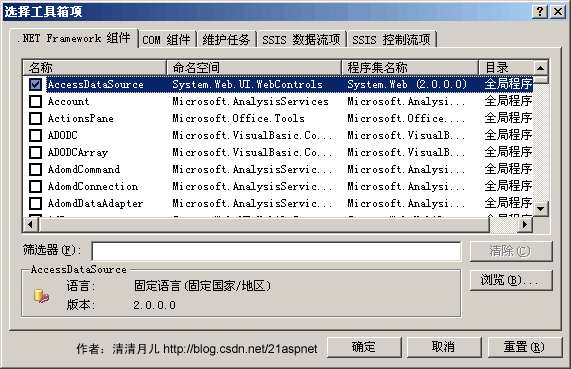
点击浏览,找到dll所在目录。
这时发现工具箱里多出FCKeditor控件。
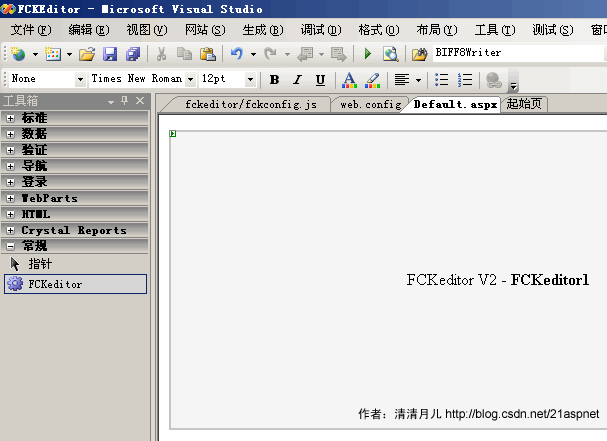
6.拖拽FCKeditor到页面上
7.配置WebConfig
<?xml version="1.0"?>
<!–
      注意: 除了手动编辑此文件以外,您还可以使用
      Web 管理工具来配置应用程序的设置。可以使用 Visual Studio 中的
       “网站”->“Asp.Net 配置”选项。
      设置和注释的完整列表在
      machine.config.comments 中,该文件通常位于
      \Windows\Microsoft.Net\Framework\v2.x\Config 中
–>
<configuration>
    <appSettings>

      <add key="FCKeditor:BasePath" value="~/fckeditor/"/>

      <add key="FCKeditor:UserFilesPath" value="~/upload/" />   同目录一定要用~

    </appSettings>

    <connectionStrings/>
<system.web>
说明:BasePath是fckeditor所在路径,fckeditor由于我们直接放网站目录下这样写就可以,如果您的网站多放几层适当调整即可。
UserFilesPath是所有上传的文件的所在目录。为什么要设置成/Files这样而不是~/Files,因为FCKeditor使用这个值来返回你上传后的文件的相对路径到客户端。否则的话客户访问的时候就会取客户的机器目录而不是http形式的目录。
9.修改fckeditor/fckconfig.js文件
在第182行的位置
var _FileBrowserLanguage = ‘asp’ ; // asp | aspx | cfm | lasso | perl | php | py
var _QuickUploadLanguage = ‘asp’ ; // asp | aspx | cfm | lasso | php
改为
var _FileBrowserLanguage = ‘aspx’ ; // asp | aspx | cfm | lasso | perl | php | py
var _QuickUploadLanguage = ‘aspx’ ; // asp | aspx | cfm | lasso | php
修改editor\filemanager\connectors\aspx\config.ascx CheckAuthentication() 函数改成return (Session[ “IsAuthorized” ] != null); UserFilesPath = “/upload/”;等
<body>
      <form id="form1" runat="server">
      <div>
<fckeditorv2:fckeditor id="FCKeditor1" runat="server" DefaultLanguage="zh-cn" Height="400px" Width="660px" ></fckeditorv2:fckeditor>
      </div>
      </form>
</body>
怎么样获取结果呢?FCKeditor1.Value就是。 Request.Form[“FCKeditor1”].ToStrin();
以 ‘_’ 开头的文件及文件夹删除